How to Use Elastic Audio in Pro Tools
In this video, Grammy Award-winning recording engineer, Steve Lamm, shows you the features of Elastic Audio in Pro Tools. This functionality conveniently enables correction of audio issues that may arise from various instruments on mono tracks—such as keyboards, electric guitars, bass guitars or miced vocals.
Here is a basic breakdown on how to achieve the most favorable results:
Set Analysis Points in Elastic Audio
- On the Pro Tools channel find the gray section at the bottom of the screen that looks like an inverted wine glass.
- Click on it to view multiple options.
- Choose the option for the type of track you are using.
- Pro Tools will then analyze the track to create a number of analysis points.
- Select option 5 to bring up Elastic Audio properties, then increase or decrease the sensitivity to create more or less analysis points.
Time Stretching in Elastic Audio
Once you set the points you prefer, you will change the view from Analysis to Warp. In Warp view you can begin to move markers around. The markers will be created on transient. Wherever Pro Tools finds a transient, it will create an analysis point. As you continue to move that point around, it will automatically time stretch the audio.
It’s important to note that when you create a point, be sure to place anchors on either side. You can do this by holding down the shift key when you click a warp marker, so it will automatically place anchor points on either side. For a quick shortcut:
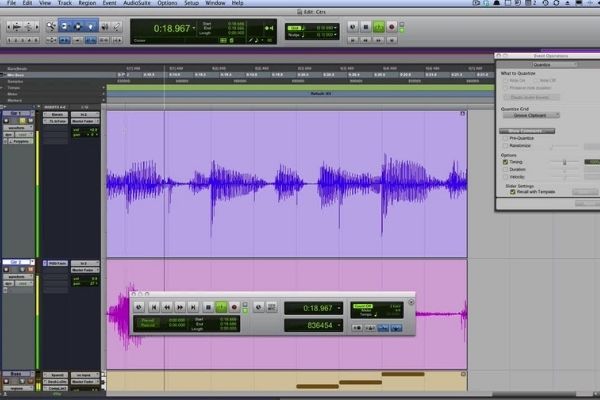
- Select the entire file by holding down the option key for MAC users (or ALT key for PC users), then hit the zero key.
- The Quantize menu will appear.
- Set your strength to one percent.
- Click apply.
- Select option 5 to bring up Elastic Audio properties, then increase or decrease the sensitivity to create more or less analysis points.
This shortcut will not move any of the warp points, but it will create a warp marker on every analysis point. This way you don’t have to worry about creating anchors on each one. Then, it’s very simple from here. Select the part, listen to it, then drag the warp marker to where you want it placed so the part falls into time with the song.
You can quantize if the warp markers fall into the right place by selecting the track, then hitting option zero to quantize the warp markers. If they are all on transient, it will lock the whole piece into place for you. This feature is great for rhythmic and percussive guitars and drum loops. It will lock it to the beat easily. Also, the time stretching has very few negative effects on the audio when small moves are made. However, when large moves are made you can definitely start to hear it—it will sound unnatural.
Worried about over-stretching? Pro Tools will alert you when you are in a troublesome range as well. If you stretch something too far, the gap between that wrap mark and the previous one will turn red. That’s Pro Tools’ way of warning you that is not going to sound good!
Remember, always keep in mind that the best tools are still our ears. So if in doubt about the sound outcome, trust your instincts first. They should always prevail.